
Don’t Miss These Home Tax Deductions
- Published: December 22, 2014
From mortgage interest to property tax deductions, here are the tax tips you need to get a jump on your returns.
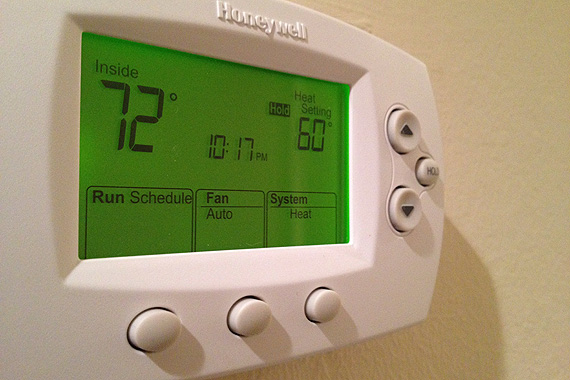
 If you itemize your deductions, you may get back some of the money you spent on mortgage interest and property taxes. Image: Liz Foreman for HouseLogic
Owning a home can pay off at tax time.
Take advantage of these homeownership-related tax deductions and strategies to lower your tax bill:
Take advantage of these homeownership-related tax deductions and strategies to lower your tax bill:
Mortgage Interest Deduction
One of the neatest deductions itemizing homeowners can take advantage of is the mortgage interest deduction, which you claim on Schedule A. To get the mortgage interest deduction, your mortgage must be secured by your home — and your home can be a house, trailer, or boat, as long as you can sleep in it, cook in it, and it has a toilet.
Interest you pay on a mortgage of up to $1 million — or $500,000 if you’re married filing separately — is deductible when you use the loan to buy, build, or improve your home.
If you take on another mortgage (including a second mortgage, home equity loan, or home equity line of credit) to improve your home or to buy or build a second home, that counts towards the $1 million limit.
If you use loans secured by your home for other things — like sending your kid to college — you can still deduct the interest on loans up $100,000 ($50,000 for married filing separately) because your home secures the loan.
PMI and FHA Mortgage Insurance Premiums
You can deduct the cost of private mortgage insurance (PMI) as mortgage interest on Schedule A if you itemize your return. The change only applies to loans taken out in 2007 or later.
By the way, the 2014 tax season is the last for which you can claim this deduction unless Congress renews it for 2015, which may happen, but is uncertain.
What’s PMI? If you have a mortgage but didn’t put down a fairly good-sized downpayment (usually 20%), the lender requires the mortgage be insured. The premium on that insurance can be deducted, so long as your income is less than $100,000 (or $50,000 for married filing separately).
If your adjusted gross income is more than $100,000, your deduction is reduced by 10% for each $1,000 ($500 in the case of a married individual filing a separate return) that your adjusted gross income exceeds $100,000 ($50,000 in the case of a married individual filing a separate return). So, if you make $110,000 or more, you can’t claim the deduction (10% x 10 = 100%).
Besides private mortgage insurance, there’s government insurance from FHA, VA, and the Rural Housing Service. Some of those premiums are paid at closing, and deducting them is complicated. A tax adviser or tax software program can help you calculate this deduction. Also, the rules vary between the agencies.
Prepaid Interest Deduction
Prepaid interest (or points) you paid when you took out your mortgage is generally 100% deductible in the year you paid it along with other mortgage interest.
If you refinance your mortgage and use that money for home improvements, any points you pay are also deductible in the same year.
But if you refinance to get a better rate or shorten the length of your mortgage, or to use the money for something other than home improvements, such as college tuition, you’ll need to deduct the points over the life of your mortgage. Say you refi into a 10-year mortgage and pay $3,000 in points. You can deduct $300 per year for 10 years.
So what happens if you refi again down the road?
Example: Three years after your first refi, you refinance again. Using the $3,000 in points scenario above, you’ll have deducted $900 ($300 x 3 years) so far. That leaves $2,400, which you can deduct in full the year you complete your second refi. If you paid points for the new loan, the process starts again; you can deduct the points over the life of the loan.
Home mortgage interest and points are reported on Schedule A of IRS Form 1040.
Your lender will send you a Form 1098 that lists the points you paid. If not, you should be able to find the amount listed on the HUD-1 settlement sheet you got when you closed the purchase of your home or your refinance closing.
Property Tax Deduction
You can deduct on Schedule A the real estate property taxes you pay. If you have a mortgage with an escrow account, the amount of real estate property taxes you paid shows up on your annual escrow statement.
If you bought a house this year, check your HUD-1 settlement statement to see if you paid any property taxes when you closed the purchase of your house. Those taxes are deductible on Schedule A, too.
Energy-Efficiency Upgrades
If you made your home more energy efficient in 2014, you might qualify for the residential energy tax credit.
Tax credits are especially valuable because they let you offset what you owe the IRS dollar for dollar for up to 10% of the amount you spent on certain home energy-efficiency upgrades.
The credit carries a lifetime cap of $500 (less for some products), so if you’ve used it in years past, you’ll have to subtract prior tax credits from that $500 limit. Lucky for you, there’s no cap on how much you’ll save on utility bills thanks to your energy-efficiency upgrades.
Among the upgrades that might qualify for the credit:
To claim the credit, file IRS Form 5695 with your return.
Vacation Home Tax Deductions
The rules on tax deductions for vacation homes are complicated. Do yourself a favor and keep good records about how and when you use your vacation home.
This isn’t a deduction, but it’s important to keep track of if you claimed it in 2008.
There were federal first-time homebuyer tax credits in 2008, 2009, and 2010.
If you claimed the homebuyer tax credit for a purchase made after April 8, 2008, and before Jan. 1, 2009, you must repay 1/15th of the credit over 15 years, with no interest.
The IRS has a tool you can use to help figure out what you owe each year until it’s paid off. Or if the home stops being your main home, you may need to add the remaining unpaid credit amount to your income tax on your next tax return.
Generally, you don’t have to pay back the credit if you bought your home in 2009, 2010, or early 2011. The exception: You have to repay the full credit amount if you sold your house or stopped using it as primary residence within 36 months of the purchase date. Then you must repay it with your tax return for the year the home stopped being your principal residence.
The repayment rules are less rigorous for uniformed service members, Foreign Service workers, and intelligence community workers who got sent on extended duty at least 50 miles from their principal residence.
Related: A Homeowner’s Guide to Taxes
This article provides general information about tax laws and consequences, but shouldn’t be relied upon as tax or legal advice applicable to particular transactions or circumstances. Consult a tax professional for such advice; tax laws may vary by jurisdiction.
One of the neatest deductions itemizing homeowners can take advantage of is the mortgage interest deduction, which you claim on Schedule A. To get the mortgage interest deduction, your mortgage must be secured by your home — and your home can be a house, trailer, or boat, as long as you can sleep in it, cook in it, and it has a toilet.
Interest you pay on a mortgage of up to $1 million — or $500,000 if you’re married filing separately — is deductible when you use the loan to buy, build, or improve your home.
If you take on another mortgage (including a second mortgage, home equity loan, or home equity line of credit) to improve your home or to buy or build a second home, that counts towards the $1 million limit.
If you use loans secured by your home for other things — like sending your kid to college — you can still deduct the interest on loans up $100,000 ($50,000 for married filing separately) because your home secures the loan.
PMI and FHA Mortgage Insurance Premiums
You can deduct the cost of private mortgage insurance (PMI) as mortgage interest on Schedule A if you itemize your return. The change only applies to loans taken out in 2007 or later.
By the way, the 2014 tax season is the last for which you can claim this deduction unless Congress renews it for 2015, which may happen, but is uncertain.
What’s PMI? If you have a mortgage but didn’t put down a fairly good-sized downpayment (usually 20%), the lender requires the mortgage be insured. The premium on that insurance can be deducted, so long as your income is less than $100,000 (or $50,000 for married filing separately).
If your adjusted gross income is more than $100,000, your deduction is reduced by 10% for each $1,000 ($500 in the case of a married individual filing a separate return) that your adjusted gross income exceeds $100,000 ($50,000 in the case of a married individual filing a separate return). So, if you make $110,000 or more, you can’t claim the deduction (10% x 10 = 100%).
Besides private mortgage insurance, there’s government insurance from FHA, VA, and the Rural Housing Service. Some of those premiums are paid at closing, and deducting them is complicated. A tax adviser or tax software program can help you calculate this deduction. Also, the rules vary between the agencies.
Prepaid Interest Deduction
Prepaid interest (or points) you paid when you took out your mortgage is generally 100% deductible in the year you paid it along with other mortgage interest.
If you refinance your mortgage and use that money for home improvements, any points you pay are also deductible in the same year.
But if you refinance to get a better rate or shorten the length of your mortgage, or to use the money for something other than home improvements, such as college tuition, you’ll need to deduct the points over the life of your mortgage. Say you refi into a 10-year mortgage and pay $3,000 in points. You can deduct $300 per year for 10 years.
So what happens if you refi again down the road?
Example: Three years after your first refi, you refinance again. Using the $3,000 in points scenario above, you’ll have deducted $900 ($300 x 3 years) so far. That leaves $2,400, which you can deduct in full the year you complete your second refi. If you paid points for the new loan, the process starts again; you can deduct the points over the life of the loan.
Home mortgage interest and points are reported on Schedule A of IRS Form 1040.
Your lender will send you a Form 1098 that lists the points you paid. If not, you should be able to find the amount listed on the HUD-1 settlement sheet you got when you closed the purchase of your home or your refinance closing.
Property Tax Deduction
You can deduct on Schedule A the real estate property taxes you pay. If you have a mortgage with an escrow account, the amount of real estate property taxes you paid shows up on your annual escrow statement.
If you bought a house this year, check your HUD-1 settlement statement to see if you paid any property taxes when you closed the purchase of your house. Those taxes are deductible on Schedule A, too.
Energy-Efficiency Upgrades
If you made your home more energy efficient in 2014, you might qualify for the residential energy tax credit.
Tax credits are especially valuable because they let you offset what you owe the IRS dollar for dollar for up to 10% of the amount you spent on certain home energy-efficiency upgrades.
The credit carries a lifetime cap of $500 (less for some products), so if you’ve used it in years past, you’ll have to subtract prior tax credits from that $500 limit. Lucky for you, there’s no cap on how much you’ll save on utility bills thanks to your energy-efficiency upgrades.
Among the upgrades that might qualify for the credit:
To claim the credit, file IRS Form 5695 with your return.
Vacation Home Tax Deductions
The rules on tax deductions for vacation homes are complicated. Do yourself a favor and keep good records about how and when you use your vacation home.
- If you’re the only one using your vacation home (you don’t rent it out for more than 14 days a year), you deduct mortgage interest and real estate taxes on Schedule A.
- Rent your vacation home out for more than 14 days and use it yourself fewer than 15 days (or 10% of total rental days, whichever is greater), and it’s treated like a rental property. Your expenses are deducted on Schedule E.
- Rent your home for part of the year and use it yourself for more than the greater of 14 days or 10% of the days you rent it and you have to keep track of income, expenses, and allocate them based on how often you used and how often you rented the house.
This isn’t a deduction, but it’s important to keep track of if you claimed it in 2008.
There were federal first-time homebuyer tax credits in 2008, 2009, and 2010.
If you claimed the homebuyer tax credit for a purchase made after April 8, 2008, and before Jan. 1, 2009, you must repay 1/15th of the credit over 15 years, with no interest.
The IRS has a tool you can use to help figure out what you owe each year until it’s paid off. Or if the home stops being your main home, you may need to add the remaining unpaid credit amount to your income tax on your next tax return.
Generally, you don’t have to pay back the credit if you bought your home in 2009, 2010, or early 2011. The exception: You have to repay the full credit amount if you sold your house or stopped using it as primary residence within 36 months of the purchase date. Then you must repay it with your tax return for the year the home stopped being your principal residence.
The repayment rules are less rigorous for uniformed service members, Foreign Service workers, and intelligence community workers who got sent on extended duty at least 50 miles from their principal residence.
Related: A Homeowner’s Guide to Taxes
This article provides general information about tax laws and consequences, but shouldn’t be relied upon as tax or legal advice applicable to particular transactions or circumstances. Consult a tax professional for such advice; tax laws may vary by jurisdiction.
 Dona DeZube has been writing about real estate for more than two decades. She lives in a suburban Baltimore Midcentury modest home on a 3-acre lot shared with possums, raccoons, foxes, a herd of deer, and her blue-tick hound. Follow Dona on Google+.
Read more: http://www.houselogic.com/home-advice/tax-deductions/home-tax-deductions/#ixzz3NOjZtdMv
Follow us: @HouseLogic on Twitter | HouseLogic on Facebook


 Wet snow is much heavier than dry, fluffy snow. Six inches of wet snow weighs about as much as 38 inches of dry snow. Image:


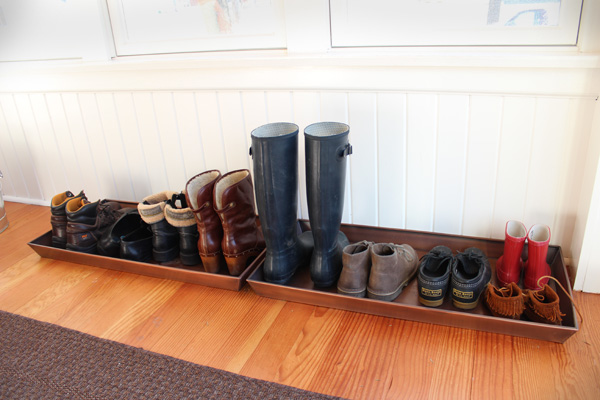 Boot trays by the front door keep wet footwear from soaking your floors. Image:
  Image:
  Image:
  Image: Liz Foreman for HouseLogic
 Image:
  Image:
  Image: Jo @


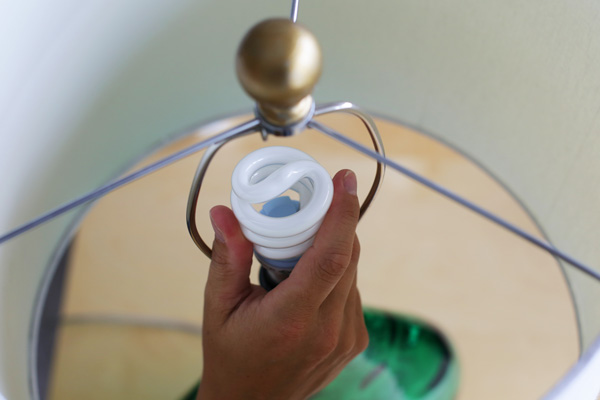
 Switching out your five most frequently-used bulbs with Energy Star-rated models will save you $75 per year, according to the EPA.


